Step By Step Skeleton Hand Drawing
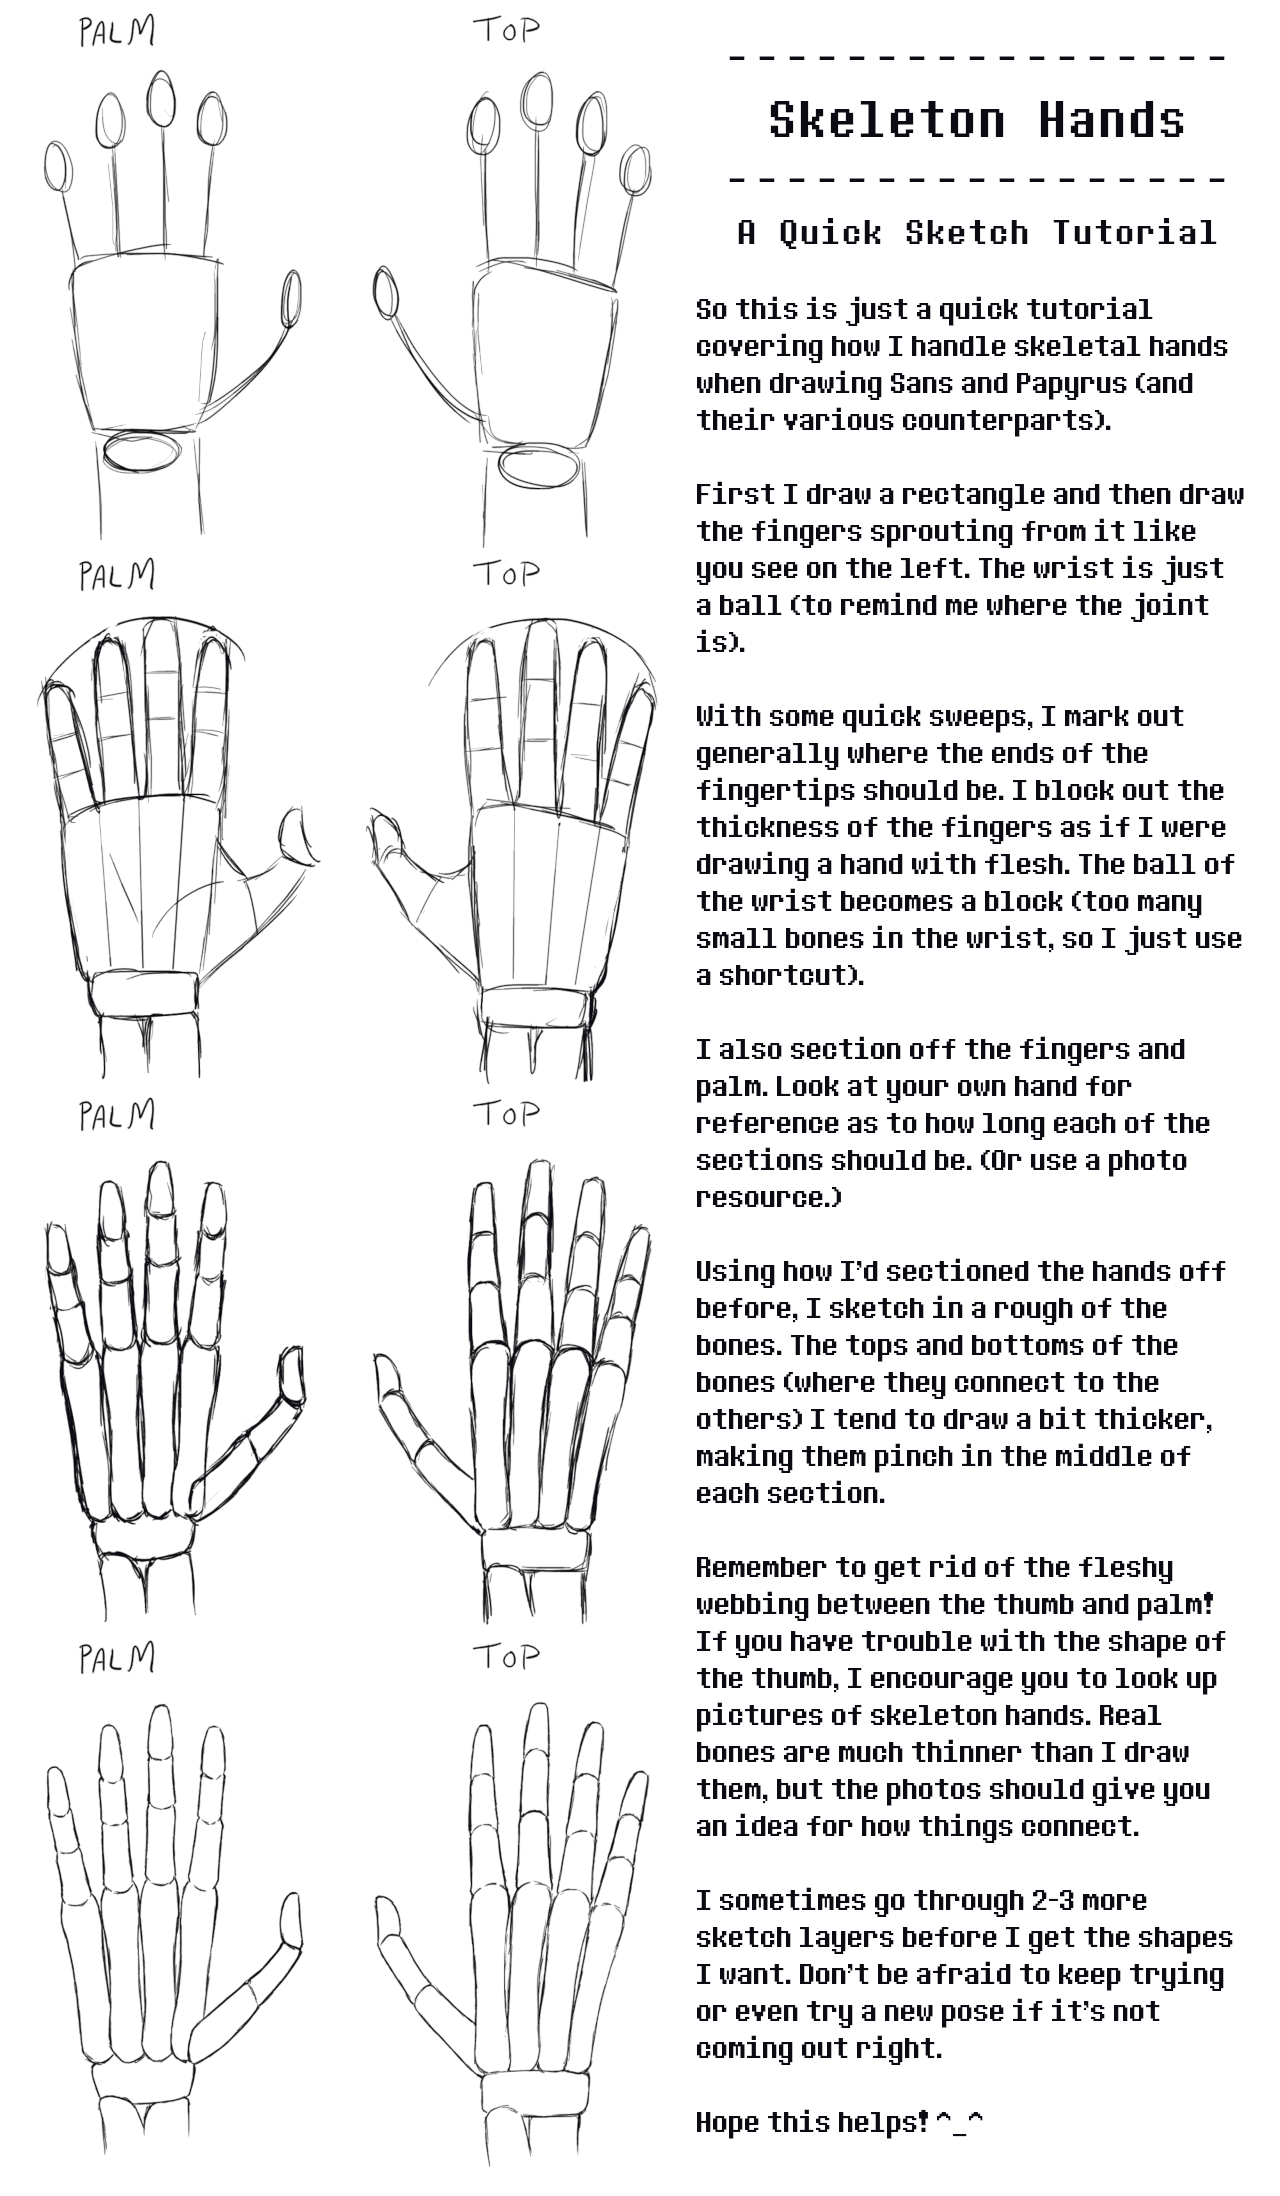
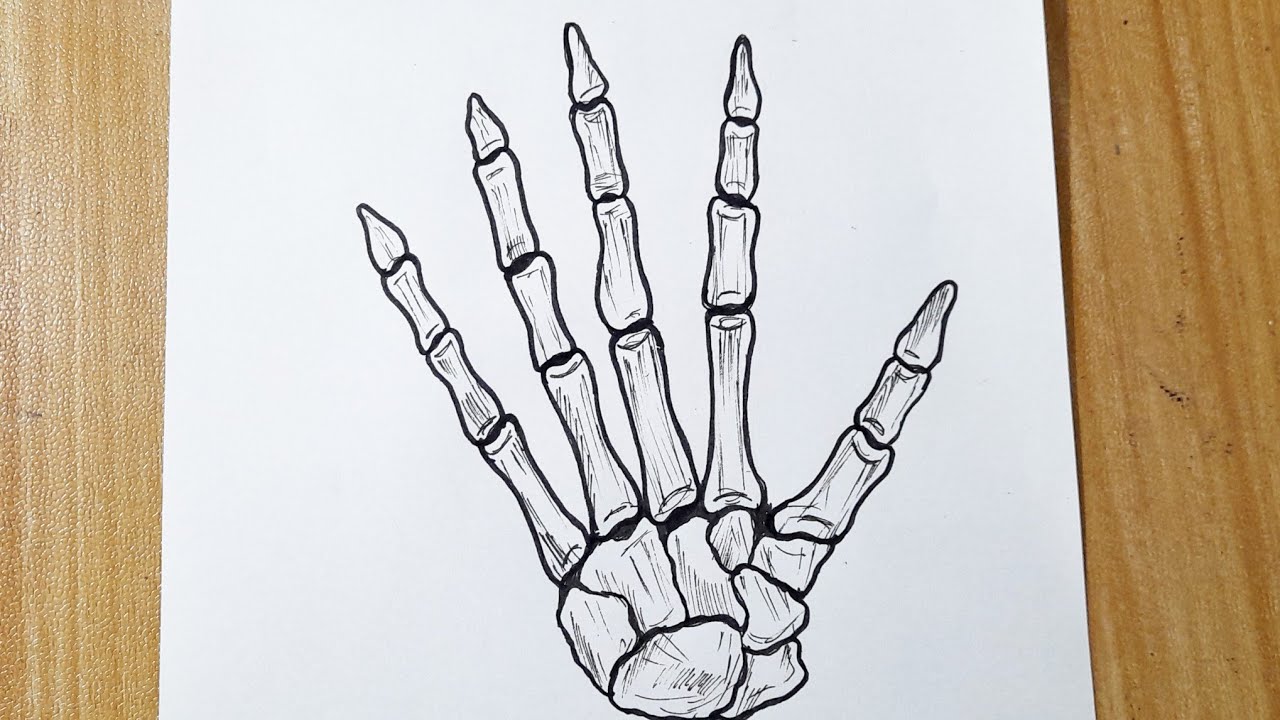
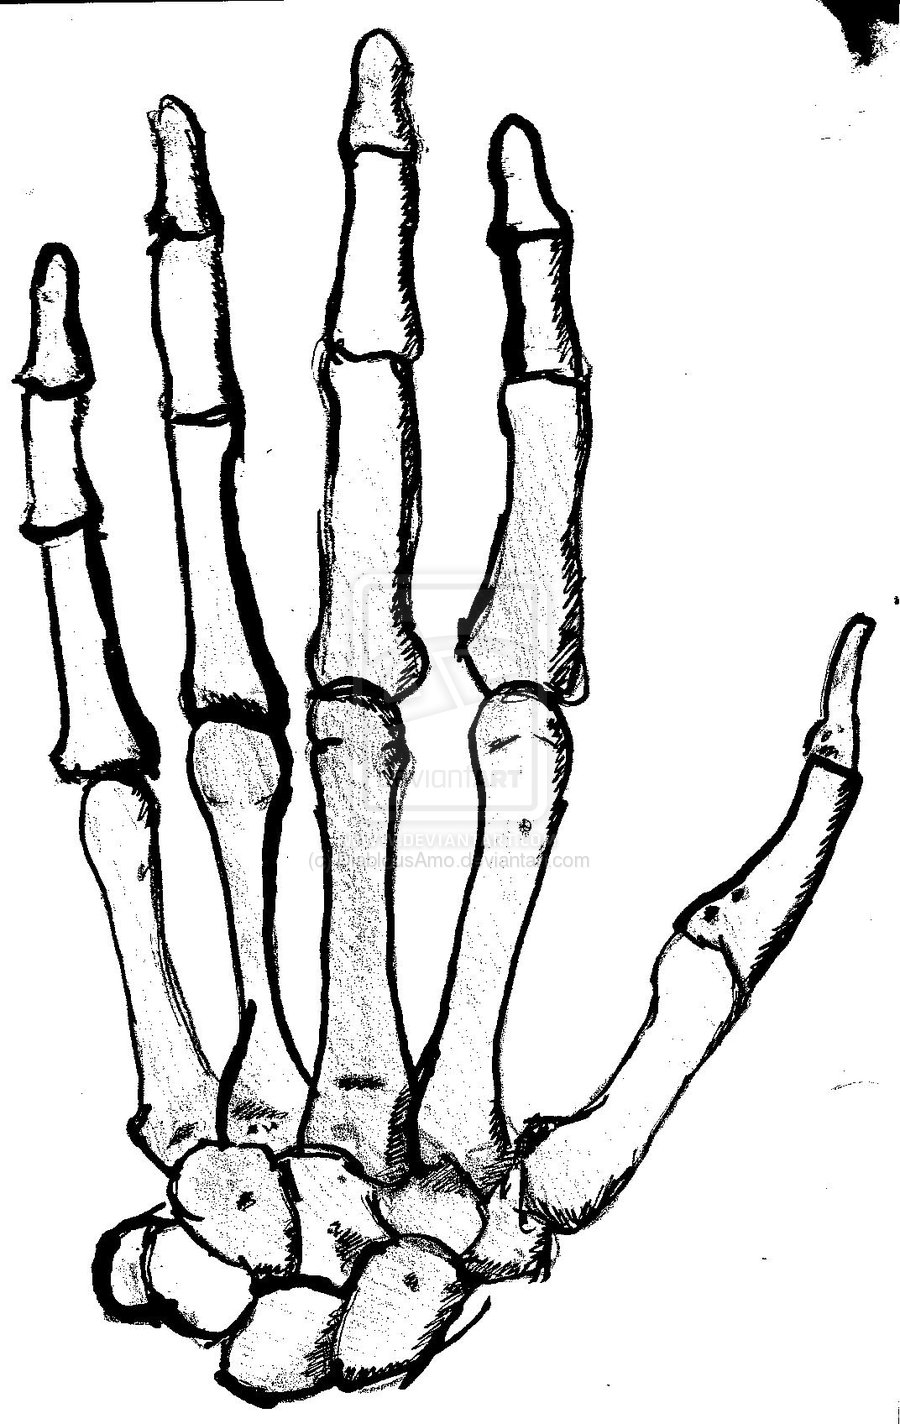
Step By Step Skeleton Hand Drawing - In this article, we will show you how to draw a skeleton hand. Web how to draw a skeleton: Remember to keep your lines light and loose to allow for adjustments later on. Using a pen for outlines and shading; Published on 21 june 2023 8 min read. This can be done freehand or using a template. Use a long, curved line to draw the rounded w shaped ends of the bone, called the proximal and distal epiphysis, and the parallel length of the bone, called the. Outline the discs between the vertebrae. Let’s get started by making a rough sketch of our skeleton hand. Web master the art of drawing a skeleton hand: Once you’re happy with the outline, start to add some definition to the fingers. Draw 12 more sections, making them smaller as you finish. Outline the discs between the vertebrae. Black marker (optional) how to draw a skeleton hand printable pdf (see bottom of lesson) in this lesson, we will begin with a new piece of paper and discover how. Begin with a basic oval shape for the palm, and then add five lines extending outwards to represent the fingers. Remember, we are drawing a skeleton hand, so keep the lines loose and sketchy. How to draw a skeleton hand easy easy for kids easy method step by step instructions help you how to. Web skeleton hand drawing is a. Begin by drawing the bone of the arm. Refinement of the skeleton hand drawing; Using a removable or light shade sketching medium like a pencil is recommended. Once you’re happy with the outline, start to add some definition to the fingers. From a reference photo, sketch the basic shapes and lines of the hand. Start by drawing a rough outline of the basic shape of a hand using a pencil. Using a removable or light shade sketching medium like a pencil is recommended. Next, begin to darken in the lines to create a more defined skeleton hand. Don’t worry about the lines being perfect at this stage—the goal is to lay the foundations of. Once you’re happy with the outline, start to add some definition to the fingers. Web skeleton hand drawing is a great way to improve your drawing skills. In this article, we will show you how to draw a skeleton hand. Draw 12 more sections, making them smaller as you finish. Begin with a rectangular shape for the palm and add. Start by lightly sketching the basic proportions and structure of the skeleton hand. Draw a vertical line and divide it into five parts—these will be the lumbar vertebrae. Published on 21 june 2023 8 min read. Let’s get started by making a rough sketch of our skeleton hand. Use a long, curved line to draw the rounded w shaped ends. Sketch the basic shapes and lines of the hand. Shade two large ovals for the eye sockets and two smaller ones at the sides. Draw 12 more sections, making them smaller as you finish. Black marker (optional) how to draw a skeleton hand printable pdf (see bottom of lesson) in this lesson, we will begin with a new piece of. When learning how to draw a. By lilly january 19, 2024. From a reference photo, sketch the basic shapes and lines of the hand. Draw a vertical line and divide it into five parts—these will be the lumbar vertebrae. In this video, we will show you how to draw a skeleton hand easy step by step with easy drawing tutorial. Black marker (optional) easy skeleton drawing printable pdf (see bottom of lesson) in today’s tutorial, we are going to learn how to make an easy skeleton drawing on paper. Once you’re happy with the outline, start to add some definition to the fingers. Outline the discs between the vertebrae. Refinement of the skeleton hand drawing; Web welcome to moshley drawing. Use a long, curved line to draw the rounded w shaped ends of the bone, called the proximal and distal epiphysis, and the parallel length of the bone, called the. Sketch the basic shapes and lines of the hand. By lilly january 19, 2024. Remember to keep your lines light and loose to allow for adjustments later on. Refinement of. Web how to draw a skeleton: A skeleton hand is a unique anatomical structure that is a great entry point into human anatomy. First, we are going to create a guide for the hands pose and then add the bones to the fingers, palms, and wrist. 419 views 10 months ago human anatomy drawing tutorials. Web in this tutorial, we’ll cover the basic anatomy of the hand and how to use that knowledge to draw skeleton hands that look accurate and believable. Start by drawing the outline of the hand. Web skeleton hand drawing is a great way to improve your drawing skills. Begin by drawing the bone of the arm. Shade two large ovals for the eye sockets and two smaller ones at the sides. Once the outline is complete, you can draw the individual bones. Add some lines to suggest the bones and joints. Use overlapping curved lines to sketch the top of the head, the cheeks, and the jaw. Don’t worry about details at this stage; Use a long, curved line to draw the rounded w shaped ends of the bone, called the proximal and distal epiphysis, and the parallel length of the bone, called the. Remember to keep your lines light and loose to allow for adjustments later on. Once you’re happy with the outline, start to add some definition to the fingers.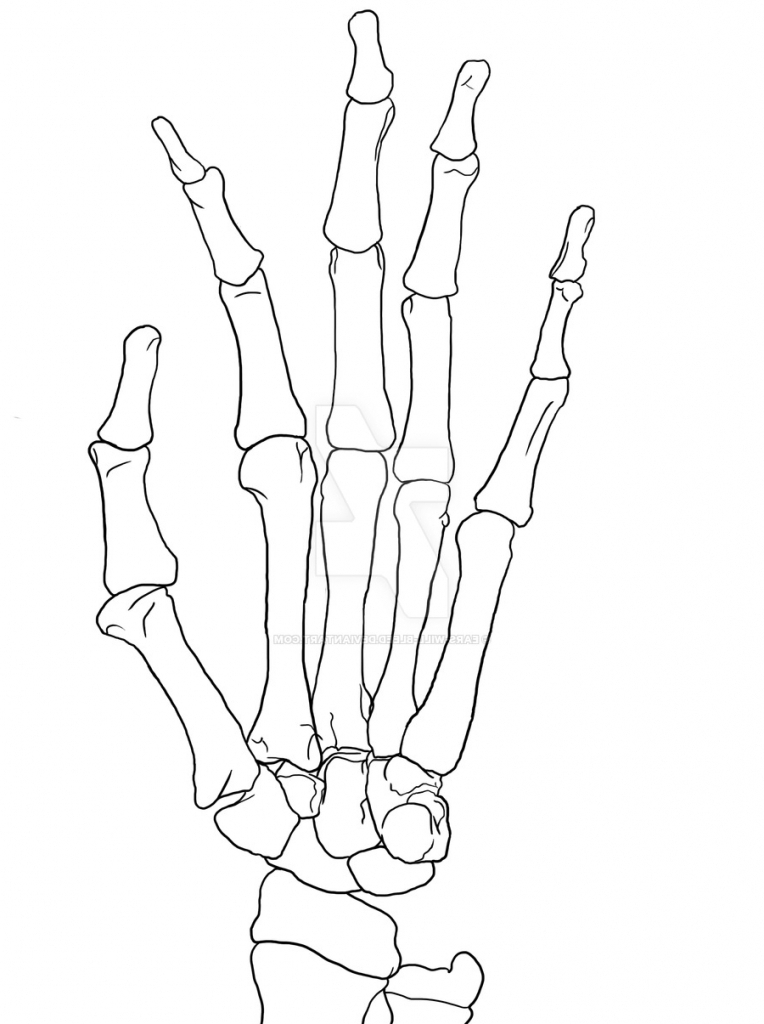
Hand Skeleton Drawing at GetDrawings Free download
Easy Step By Step Skeleton Hand Drawing Easy Drawing
How to draw skeleton hand easy step by step Skeleton drawing YouTube

How to Draw a Skeleton Hand Step by Step Human hand, Skeleton finger

Skeleton Hand Tattoo Drawing Step By Step 101hannelore

Skeleton hand How to draw hands, Skeleton drawings, Skeleton hands

How To Draw Skeleton Bones On Your Hand at How To Draw
How to Draw A Skeleton Step by Step
Skeleton Hand Drawing Tutorial at GetDrawings Free download

skeleton hand drawing Skeleton hands drawing, How to draw hands, Drawings
When Learning How To Draw A.
In This Article, We Will Show You How To Draw A Skeleton Hand.
Web 2 Creating A Skeleton Hand Sketch Step By Step.
Using A Removable Or Light Shade Sketching Medium Like A Pencil Is Recommended.
Related Post: